Recent updates

Follow new updates and improvements to Plannr Technologies.

🎉 New transactions importer, premiums in Inflows & Outflows, adviser filters on plans, and a new Holdings API endpoint!

This release brings four updates: a new way to import transactions in bulk, Premiums shown on their own in the Inflows & Outflows widget, adviser filters on the Plans page, and a faster way for integrations to fetch holdings.

Transactions importer

Previously, adding transaction history to Plannr meant entering each transaction by hand. That was slow when moving data from another system or filling gaps in a provider feed, and there was no way to correct lots of transactions at once.

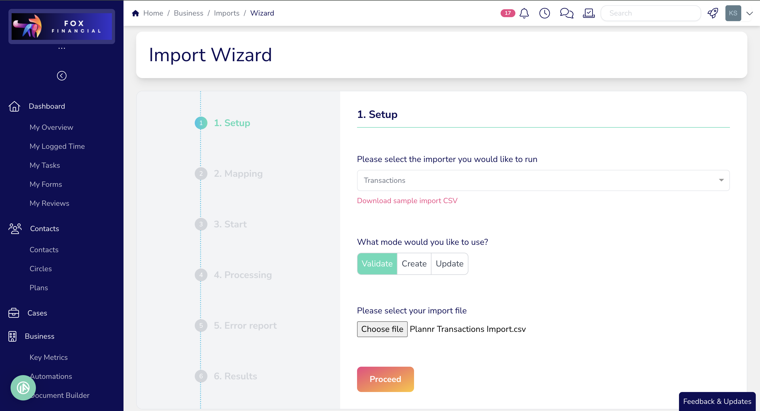
You can now import transactions from a CSV file. Go to Business > Imports, start a new import and select Transactions. Choose Validate to check your file without changing anything, Create to add new transactions, or Update to change existing ones using their transaction UUID. Upload your CSV, map the columns to Plannr fields (or reuse a previous mapping) and start the import. A sample CSV is available in the import wizard. New transactions are saved as Completed and stay editable. When updating, you only need the transaction UUID and the fields you want to change. Anything left blank keeps its current value.

In practice, that means transaction history can go in all at once rather than row by row. Each row is checked separately, so valid rows are saved even if others fail. Download the Excel error report to see which rows failed and why, then re-upload only those rows so the successful transactions aren’t created twice. The importer doesn’t spot duplicates, and it keeps amounts exactly as you enter them, including whether they’re positive or negative. Check your file against the history already in Plannr before you import.
 Premiums in Inflows & Outflows

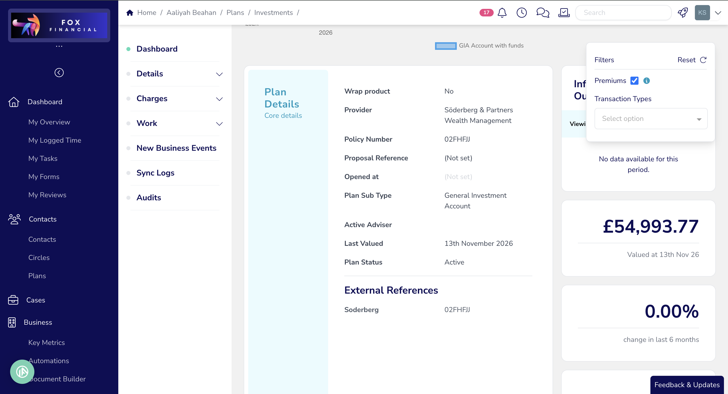
Previously, the Inflows & Outflows widget only showed results when there was an inflow or outflow transaction in the period. A period with premiums but no transactions showed No data available for this period. Deselecting every Transaction Type also brought all types back in, so you couldn’t view premiums on their own.

Premiums now works as its own filter. Deselect all Transaction Types and leave Premiums selected. Inflows and Outflows show £0.00, and the Overall Total equals the premiums for the period, even if there are transactions in that period. Results now show whenever there are qualifying premiums, without needing any transactions. The widget shows (filtered) with a Reset option, and the explanatory text makes clear that the total includes premiums.

In practice, you can see a client’s premiums for any period without transactions getting in the way. For example, a period with £500.00 of premiums shows an Overall Total of £500.00. Premiums are worked out exactly as before, using the premium information held against Investments & Plans and the same date range, plan type and frequency rules.
 Filter plans by adviser

Previously, the Plans page could only be filtered by Seller, and only by typing a name. There was no way to see one adviser’s book of plans without opening each client.

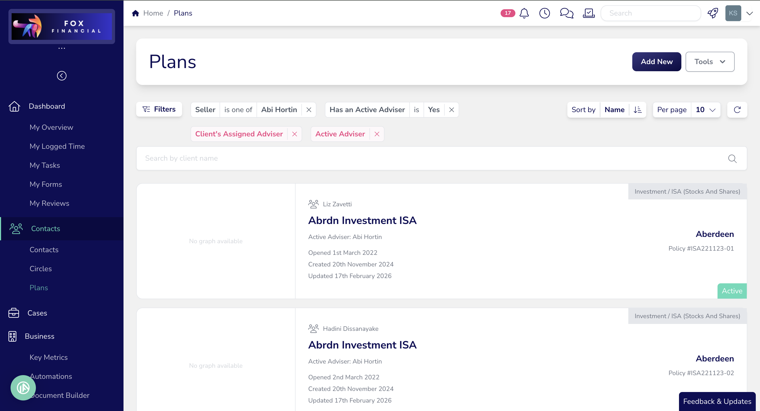
There are three new filters on the Plans page: Active Adviser, Client’s Assigned Adviser and Has an Active Adviser. The Seller filter now uses the staff picker too. Open Plans, add a filter and pick one or more people from your staff list. The list appears as soon as you open the picker, and you can type a name to narrow it down. For Has an Active Adviser, choose Yes or No. Picking several people in one filter shows plans that match any of them. Using several filters together shows only plans that match all of them..

In practice, you can pull up an adviser’s plans in a couple of clicks and combine that with other filters, such as a tag for clients due a review this month. Joint plans match if either owner has the adviser you picked, and they never appear twice. Deleted staff can’t be picked, so use Has an Active Adviser: No to find a departed adviser’s plans for reassigning. 
 Holdings API v2: all holdings in one call

Previously, the Plannr API could only read holdings one plan at a time. To get every holding, an integration had to list every plan and then call the API once for each one.

We’ve now added a new endpoint, GET /api/v2/holdings, that returns every holding in your firm in one place. You can filter by plan, sub-account, plan type, provider (including leaving out providers) and updated date. Each holding includes its plan and sub-account identifiers, so you can tell where it belongs. Active holdings are returned by default, and inactive ones are available on request. If you have built against our API and need more details on this new feature, head to our API documentation here: PlannrCRM API documentation

The good news, integration partners and firms with their own systems can sync large books of holdings quickly. It pages through over a million holdings at a steady speed. The endpoint is read only and available to every firm, with no add-on to switch on. The existing v1 holdings endpoints are unchanged, and the usual visibility rules still apply.

🎉 4 NEW releases!

Dynamic Planner, holiday cover for conversations, improvements to moving documents, and new task checklist rules

This release brings four updates: a direct connection to Dynamic Planner, cover for your conversations while you’re away, a quicker way to move documents to the right place, and a firm-wide rule for checklist completion.

Dynamic Planner integration

Our integration with Dynamic Planner is now live! Previously, profiling a client meant keying their details into Dynamic Planner, then downloading reports and risk results and adding them back to Plannr by hand.

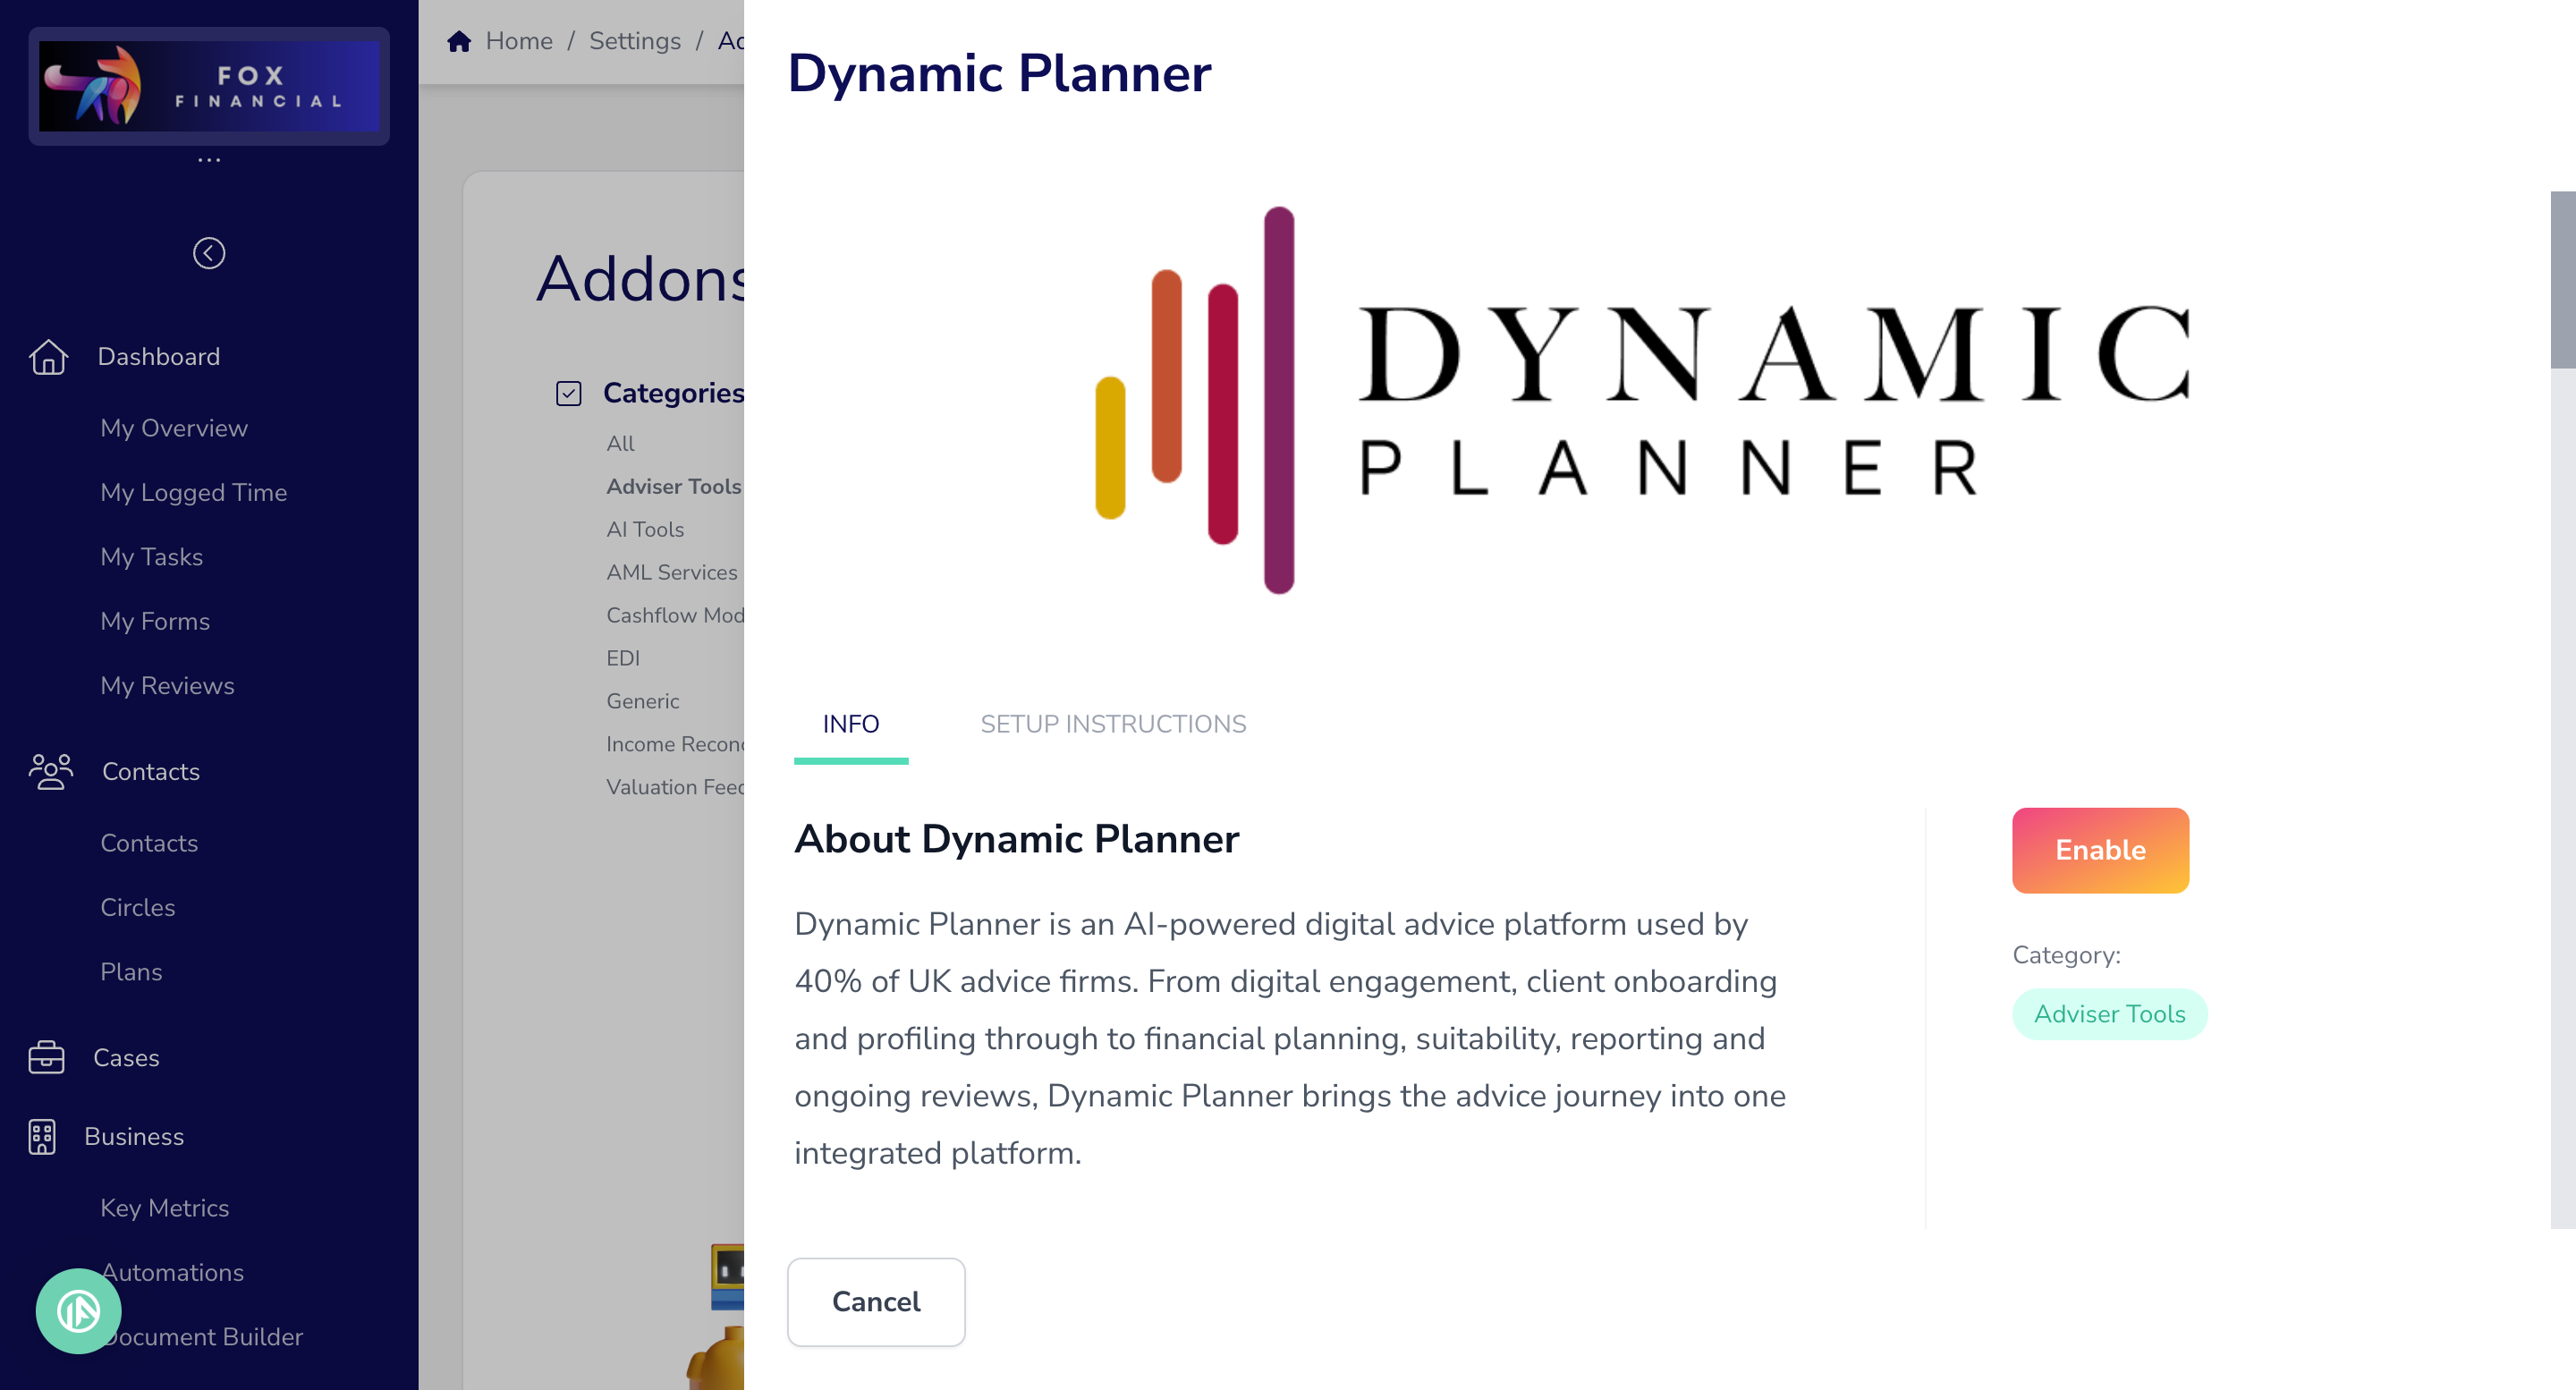
Plannr now connects directly to Dynamic Planner. From any individual or joint client, or a circle, select Actions > Launch Dynamic Planner. Dynamic Planner opens in a new tab with the client’s details already there. If the client already exists in Dynamic Planner, you’ll see both sets of details side by side with any differences highlighted. You can then update the Dynamic Planner record or keep it as it is. When you finish profiling, the risk number, the risk description and any notes are saved to the client’s Risk tab automatically. Reports you save to the Dynamic Planner document store go to the client’s Documents tab.

In practice, that means no more rekeying, exporting or importing, and your risk profiles and suitability evidence sit against the right client without anyone filing them. At this stage, personal and contact details are sent to Dynamic Planner. To get started, an Owner or Admin enables the add-on under Settings > Addons > Dynamic Planner. Each adviser then connects their own Dynamic Planner account the first time they launch it. You’ll need a valid Dynamic Planner licence.

Holiday cover for conversations

Out of Office could already send clients an auto-reply while you were away, but the conversation then just waited for your return. Nobody else was told the client had replied, and the auto-reply counted as a response, so it was easy for messages to go unanswered.

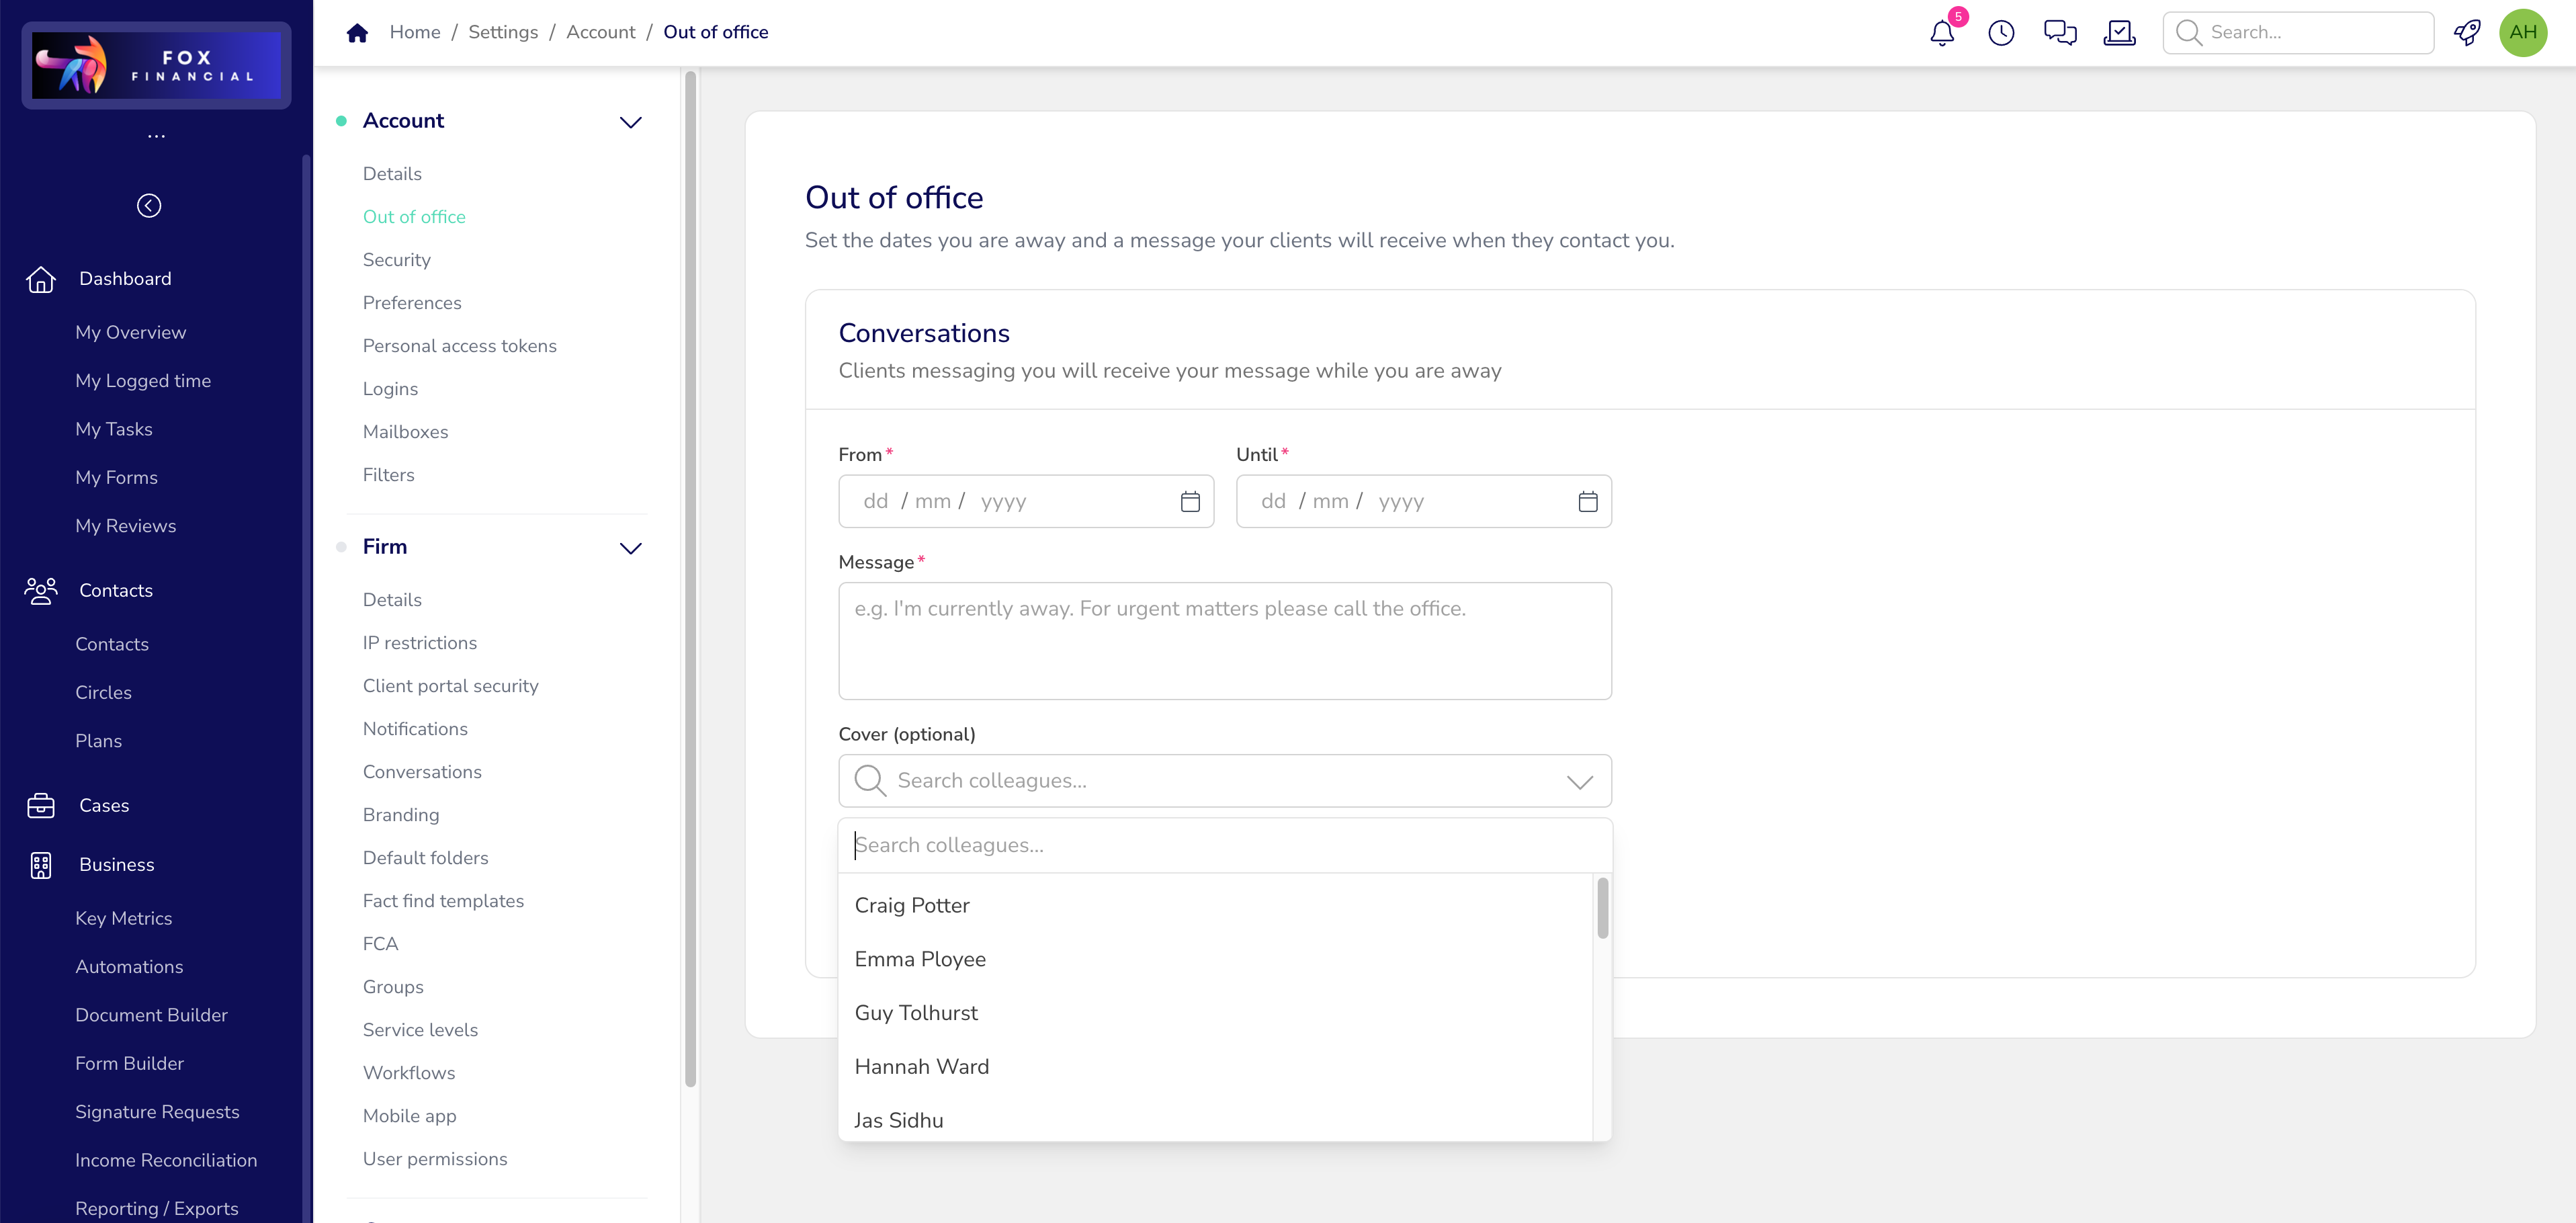
You can now choose a colleague to cover your conversations while you’re away. Set this in the new Cover field under Settings > Account > Out of office. Firms can also set a Default cover under Settings > Firm > Conversations, which applies to anyone who hasn’t chosen their own. When a client messages a conversation you’re part of while you’re away, your cover is added to that conversation and gets the usual new-message notification. If your chosen cover is also away, Plannr uses the firm default instead. There’s also a new Awaiting reply view in the conversations panel. It lists every conversation where the client spoke last and nobody at the firm has replied yet. Auto-replies don’t count as a reply.

In practice, clients still get your auto-reply, but now a real person picks up their message too. Cover is only added to conversations where a client actually writes in, so quiet threads aren’t touched. Your team also gets one clear list of everything still waiting for a reply.

Moving documents between clients, plans, cases and circles

Documents often end up in the wrong place, such as a suitability report in a client level folder rather than the case it relates to. Fixing that meant downloading the file and uploading it again in the right place, which left duplicates behind.

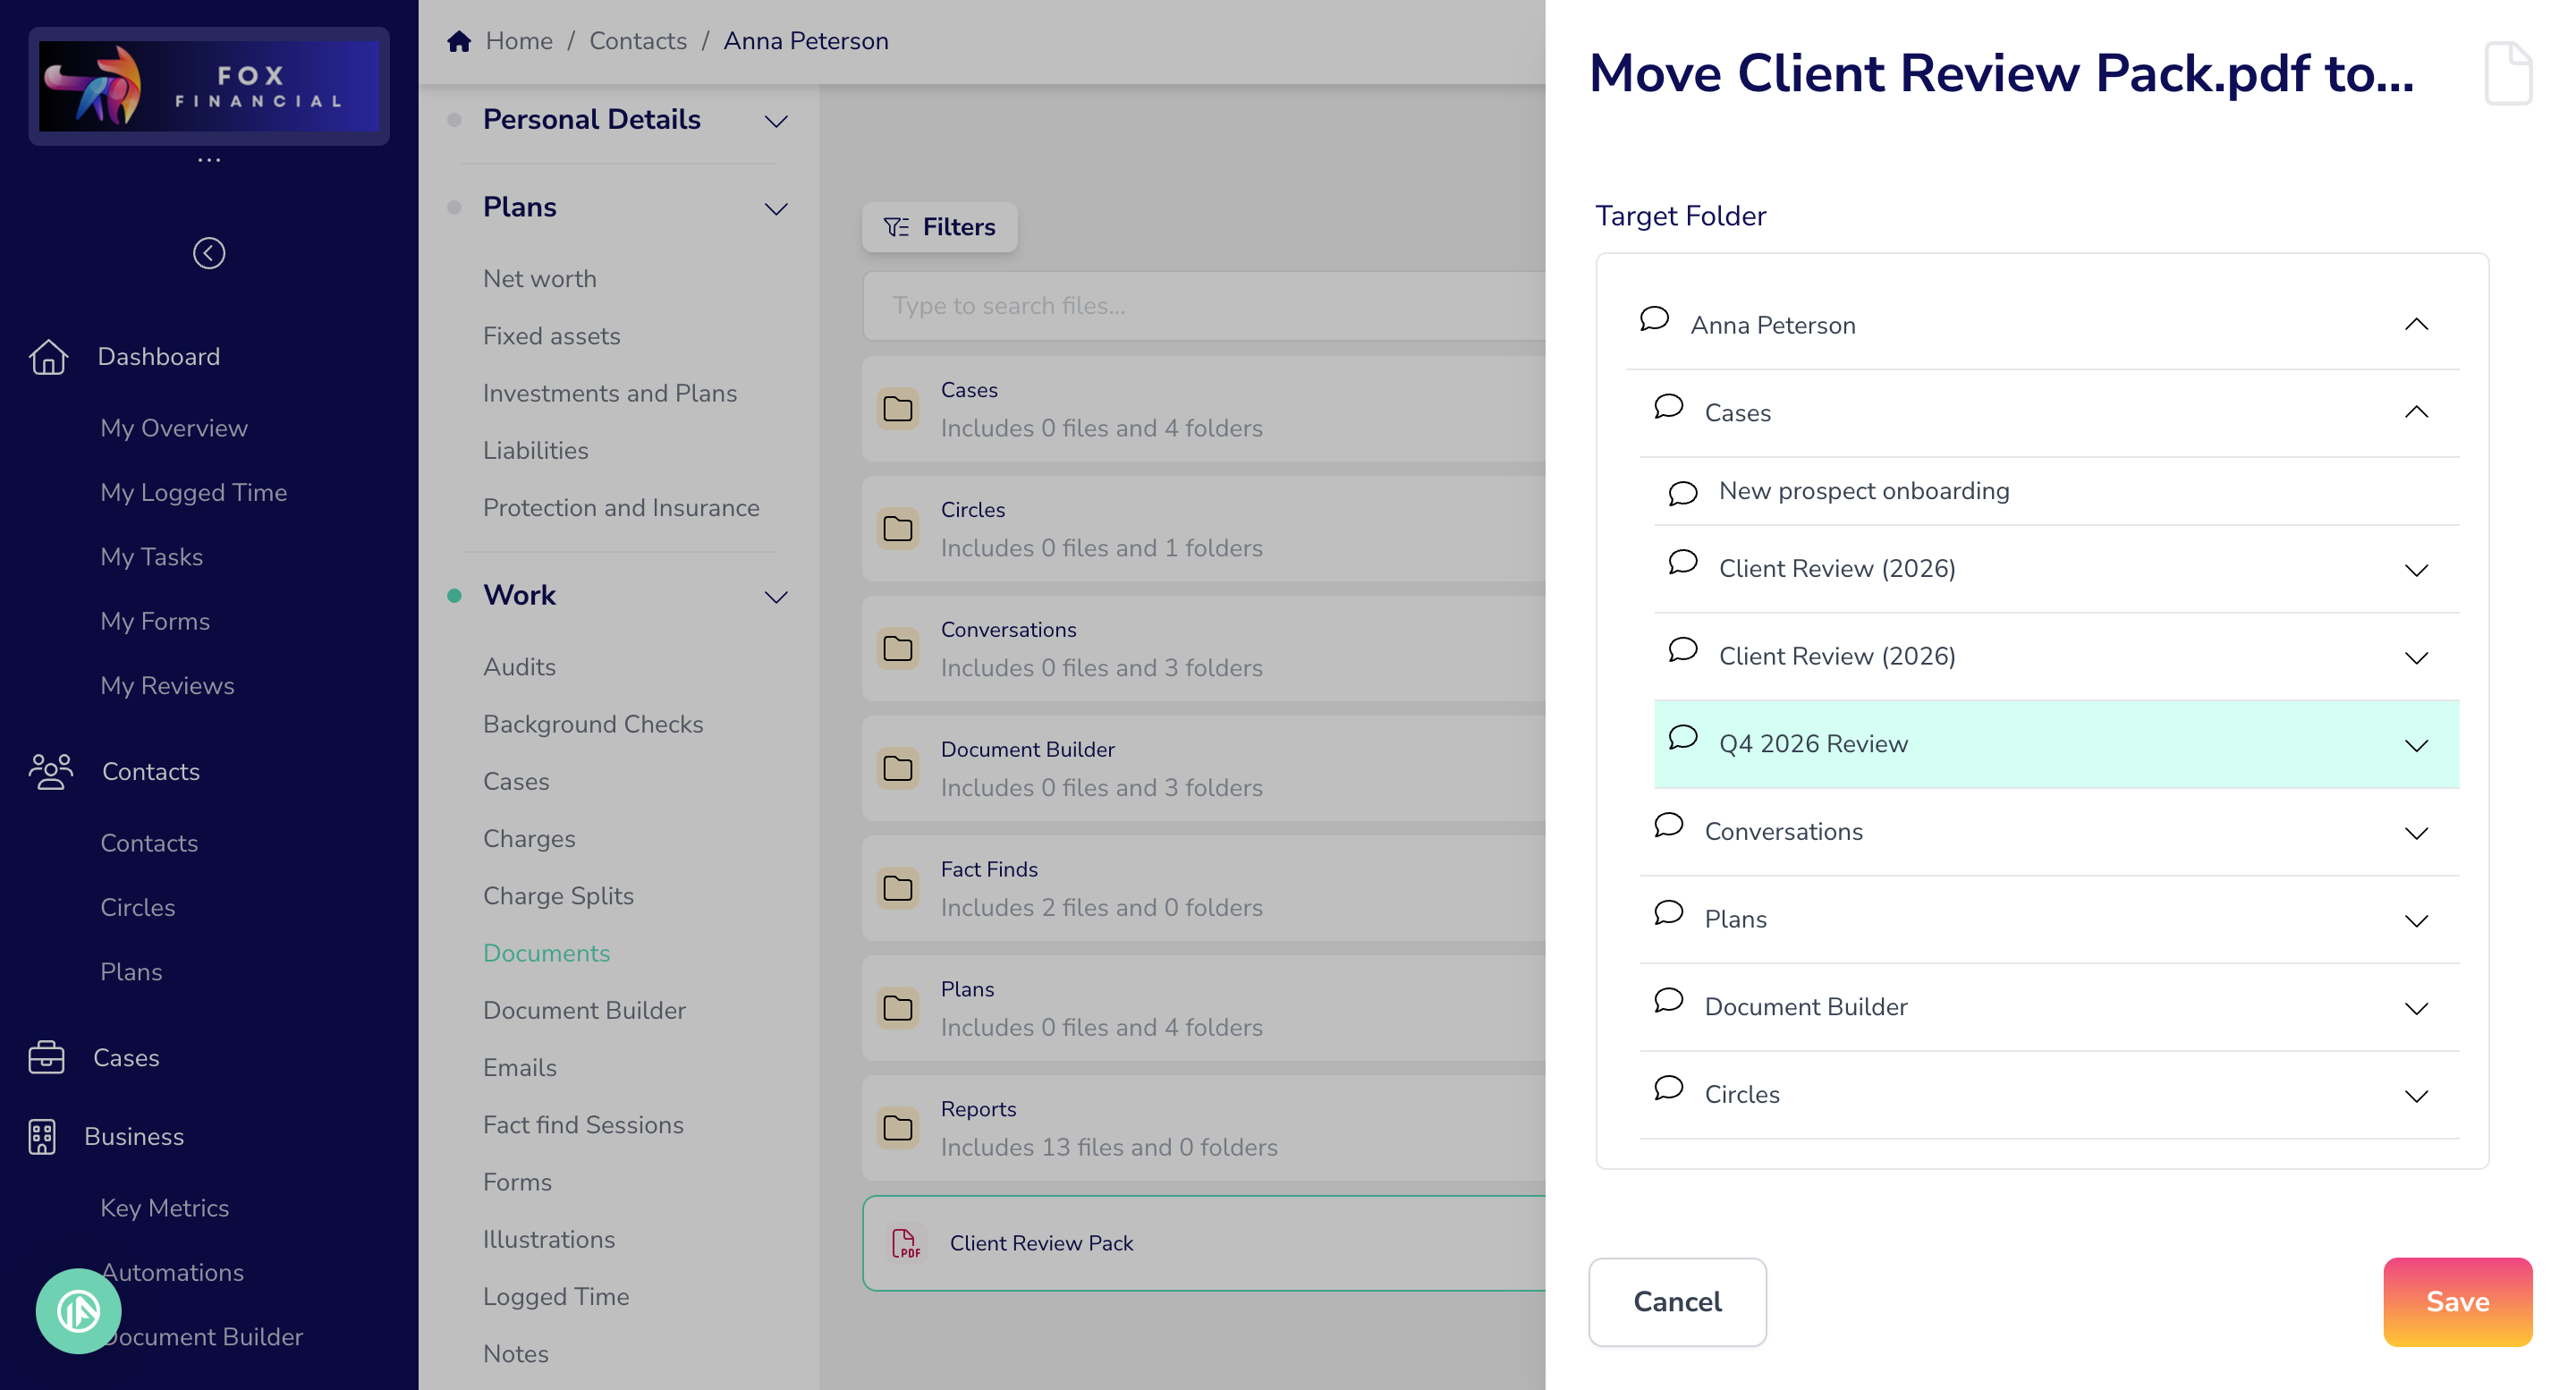
You can now move files and folders to wherever they belong: a client’s own documents, a plan, a case or a Circle. Choose Move on a file or folder, expand the folder tree in Target Folder, select where it should go, and click Save. Moving a folder moves everything in it, and nothing is left behind in the old location. Open Documents from the client’s profile so you can see all of their plans, cases and Circles in the picker.

New: Circle documents (client portal):

  • Documents on a Circle was greyed out before. Clients with Read or Write circle access now see the circle's own client-readable folders, never other members' individual folders.

  • Write access lets clients upload, create folders and move files within the circle.

In practice, tidying up a client’s file takes a few clicks, and household paperwork can go straight into a shared Circle where authorised members can see it in the portal. Moving a document changes where it belongs, which can change who can see it. If you move something into a Circle, check the member’s Circle Access and the folder permissions afterwards.

Require checklist items to be completed before completing a task

Checklists on tasks were a guide rather than a rule. A task could be marked complete with checklist items still unticked, which made it hard to be sure every step had actually been done.

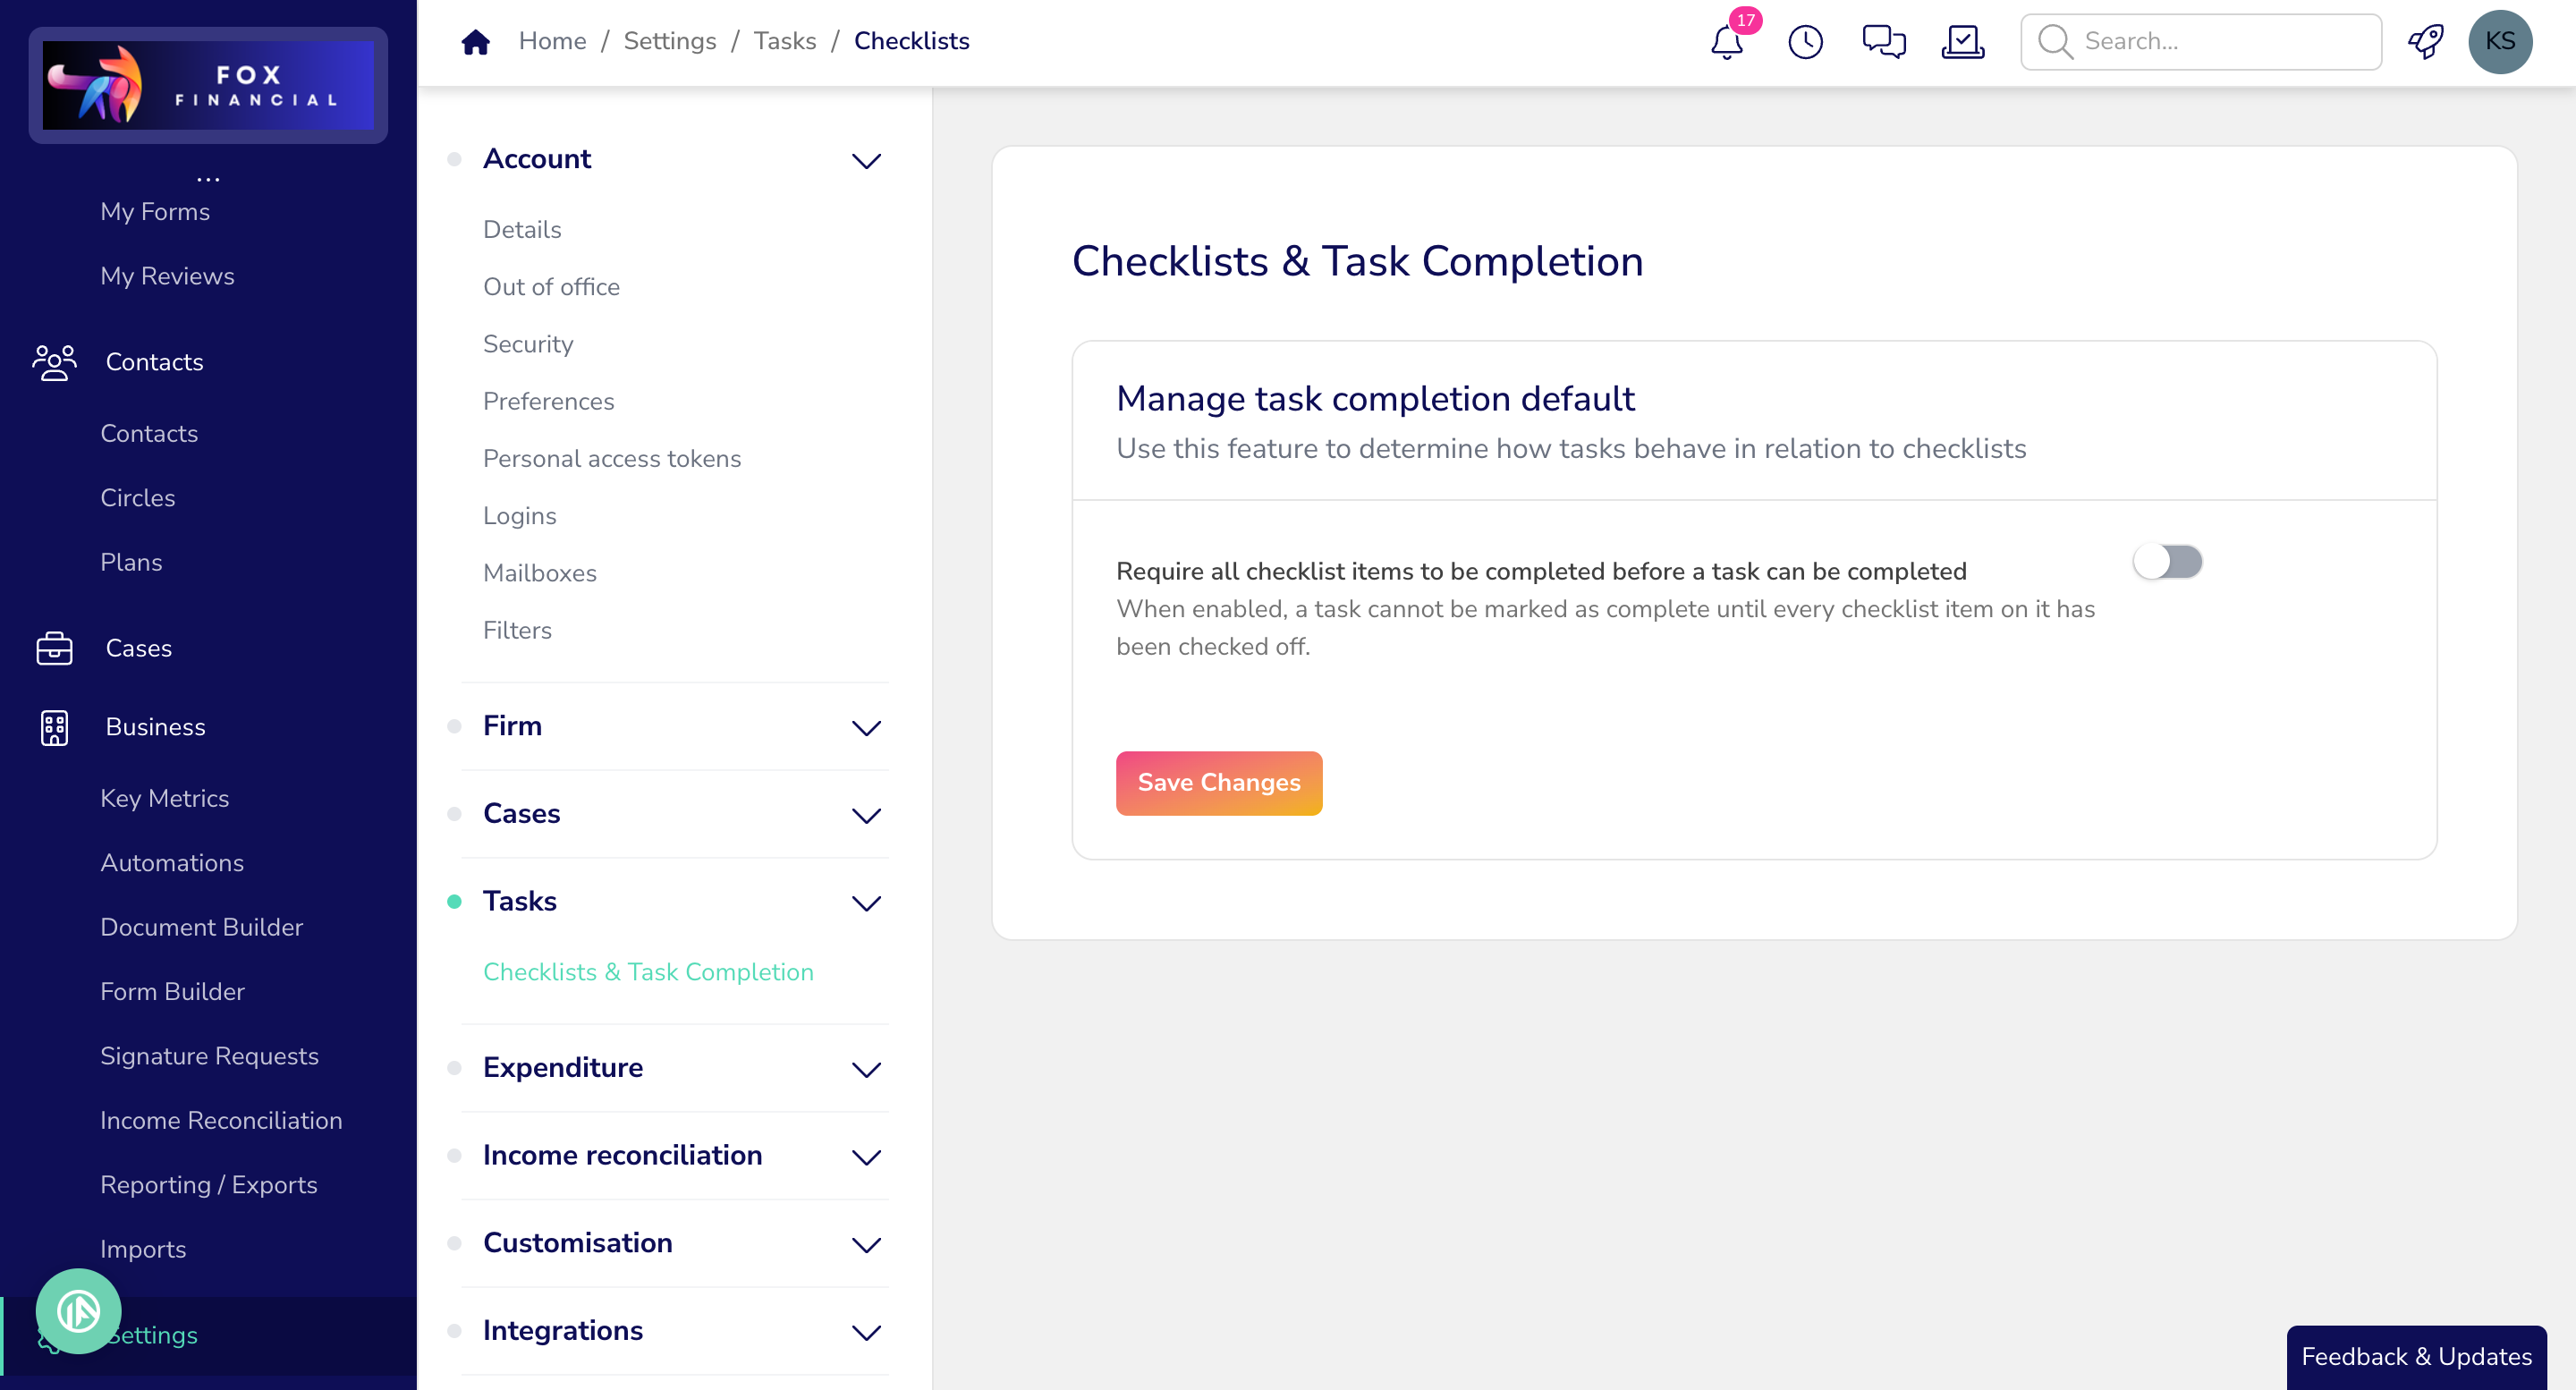
There’s a new firm-wide setting under Settings > Tasks > Checklists & Task Completion. When you switch on Require all checklist items to be completed before a task can be completed, every item across every checklist on a task must be ticked before the task can be closed. If anything is still outstanding, Plannr shows: “The task cannot be completed as it has incomplete checklist items.”

In practice, firms that rely on checklists for compliance steps can be sure nothing is skipped. The setting applies straight away to existing open tasks as well as new ones. Tasks without checklists aren’t affected. The setting is off by default and you can switch it off again at any time. It works alongside the separate Tasks & Case Completion setting, which controls whether outstanding tasks stop a case being completed.

Some useful updates to Plannr this week that enhance how you’re working day-to-day! Keep your eyes peeled for more releases coming soon 👀

🚀 New: Client Valuation Reports in PDF 🎉

Great news! New stylised client valuation reports are available in Plannr! This replaces the excel downloads you've had thus far, and now gives more options for customisation and polish.

🤝 You can write your own introduction paragraph for each client and choose exactly what goes in the report.

What does this mean in practice?
 You can create a professional valuation report from inside the client record in a few clicks, ready to send to your client before your next review meeting.

How to create a valuation report

  1. Open the client record and click Add New → Valuation Report.

  2. Give the report a name and set the Date from and Date to.

  3. Add your Introduction paragraph to give the report a personal touch.

  4. Choose what to include: holdings, inactive plans, a profit/loss column, goals and risk profile.

  5. Click Generate Report. You'll get a notification when it's ready.

  6. Find the PDF in the client's files under the Reports folder, then preview, download and share it.


📺 Prefer to watch? See the walkthrough video

Earlier updates